Wow, I've spent the last week days knocked back with one almighty cold. I'm still not quite better, but on the plus side I got to catch up on all my missed episodes of Downton Abbey...aren't you loving the fashion this series?
I promised these sewing tips for the
Summer and the City Pattern. Now that you've drafted the bodice pattern, (see parts
1 and
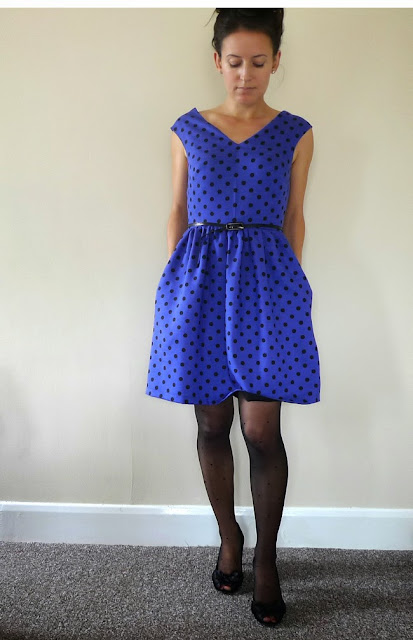
2) here are a few suggestions on assembling the dress. I'm using this lightweight woven polka dot fabric from my stash.
In my first version, I've used self facing for the bodice and in this version I'm using a traditional lining for the full length -- it's your choice.
I've also used a 22" zipper.
29) Once you have your bodice lining and fabric pieces cut out, iron in the seam allowance at all shoulder seams, pressing wrong sides together. Remember we want a slight curve at the shoulder. This is tricky to iron in, and don't be too hard on yourself if it doesn't look perfect as you can bring ot the curve at the sewing stage.
30) a) Sew the main fabric together at side seams, leaving the centre back seams unstitched.
b) Do the same for the lining.
c) Sew the lining and bodice pieces right sides together i) at the V-neck ii) at the arm holes iii) at the top of the bodice back.
Leave the the shoulder seams and centre back seam free.
31) Make small clips in the arm hole area, making sure not to go through the stitch line
32) Turn the bodice right side out and press all stitch lines.
33) Stitch the front and back shoulder seams of the main fabric right sides together, paying attention to creaing a very slight curve to mimic the pattern. Be careful not to catch the lining.
There are different ways to finish the lining. If you're very dexterous with your sewing machine you can machine stitch most of it, but this can be tricky to do and I usually prefer to hand stitch.
34) Pin the lining in place and stitch along the pressed seam allowance fold.
The skirt is a basic dirndl skirt. Measure the full circumference of the waistline of the bodice pattern and, depending on the weight and thickness of the fabric you're using, cut a rectangle for the skirt with a skirt to waist ratio of about 2 to 1 or 2.5 to 1. (Or maybe the ratio will simply be decided by the amount of fabric you have left to work with--usually is the case with me!)
Now you have another choice:
- You can gather the rectangle to meet the waistline as one full piece, leaving a centre back seam for the zipper.
- Or, you can add side seams with pockets. In this case, cut the rectangle in half, and then halve one piece again. The larger rectangle is the front of the dress. The two smaller ones will make up the back of the dress.
Here's how to make the pockets:
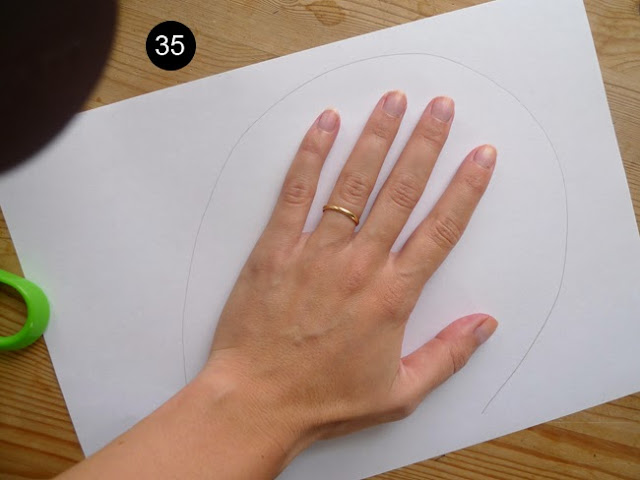
35) Draw a long curve around the shape of your hand
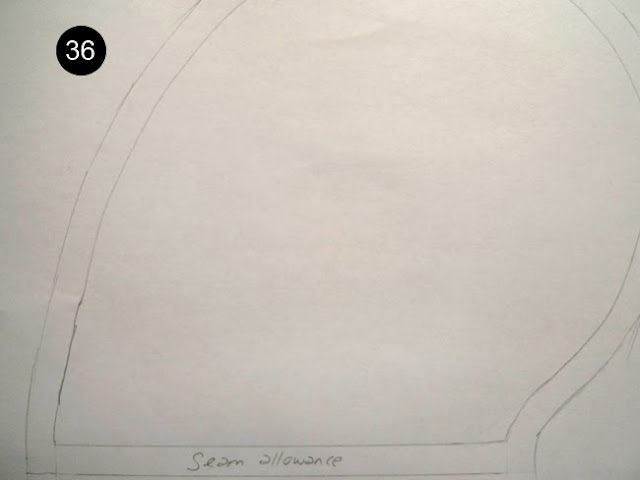
36) Connect the opening of the curve with a staight line and add seam allowance to the entire piece.
37) Decide on your pocket position, and sew the four separate pocket pieces onto the skirt pieces, along the seam allowance, right sides together
38) Press the pocket open.
Now all you need to do is sew along the side seams as you normally would, but taking a detour at the pocket by pivoting at the top and bottom of the pockets (right sides together) and leaving the opening free.
Gather the top of your skirt and stitch in place, matching the side seams.
Finish as your normally would, adding the hem, zipper and zigzagging or serging any raw seams.
As always I'd love to know if you made this dress!
Stay healthy x
