Saturday, 28 September 2013

make this pattern part 2

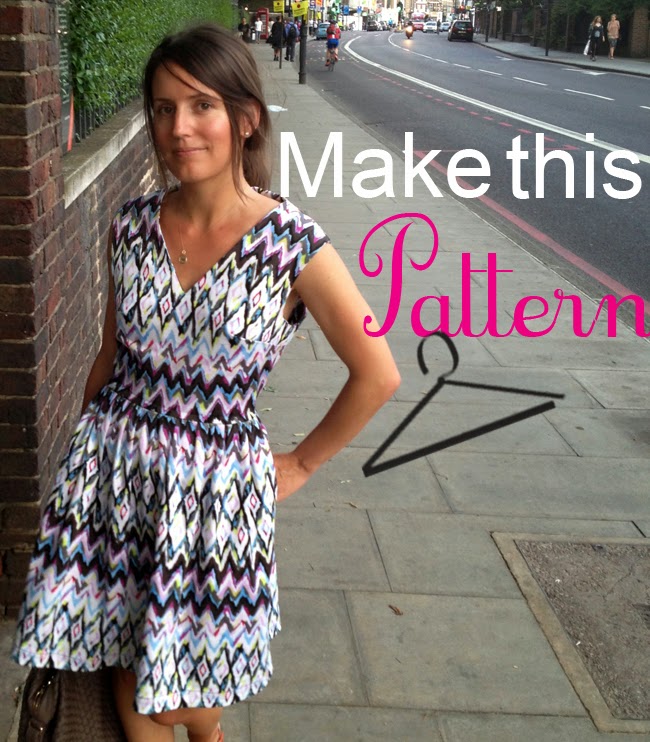
It's Part 2 of Make this Pattern for the Summer and the City dress.

Just a quick reminder - normally you would work from a block without seam allowances and add them in at the end. Since we are working from a bodice pattern that already includes 1.5cm seam allowances, we have to include them on the style lines we draw in to create the v-neck and cap sleeve.  

Here we go:

23)  a) On the bodice front, measure in 3.5cm from the neckline along the shoulder and mark. 
b) Measure 12cm down from the neckline on the centre front and mark.
c) Connect these two points with a straight line.  These measurements account for the 1.5cm seam allowance included in the pattern.  
d) Make a notch where the sewing line meets the centre front.  This is the pivot point when you sew the vneck.
24)  a) Glue a scrap piece of paper along the bodice front arm hole, extending all the way to the side seam.
b) The shoulder of the bodice on this pattern extends out over the top of the shoulder somewhat.  Draw a slightly curved line outward from the tip of the shoulder measuring about 3.5cm (the exact length of the line is up to you, just remember that it needs to include the 1.5cm seam allowance).   This is the cap sleeve.
c)  From the end of the cap sleeve, draw another freehand line which meets the arm scye dart.  Remember that this will include 1.5cm of seam allowance.
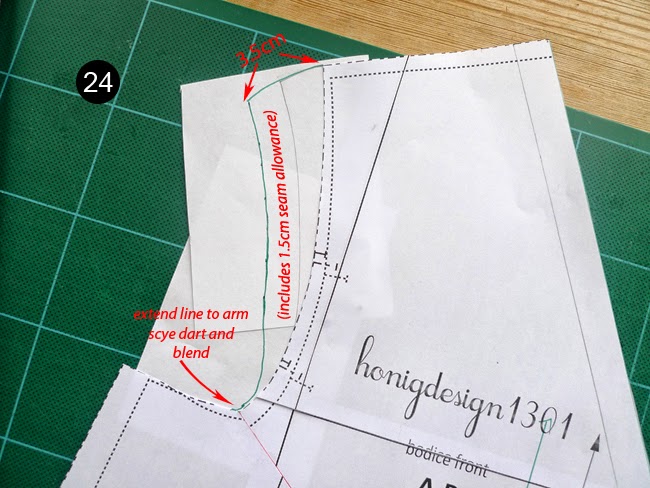
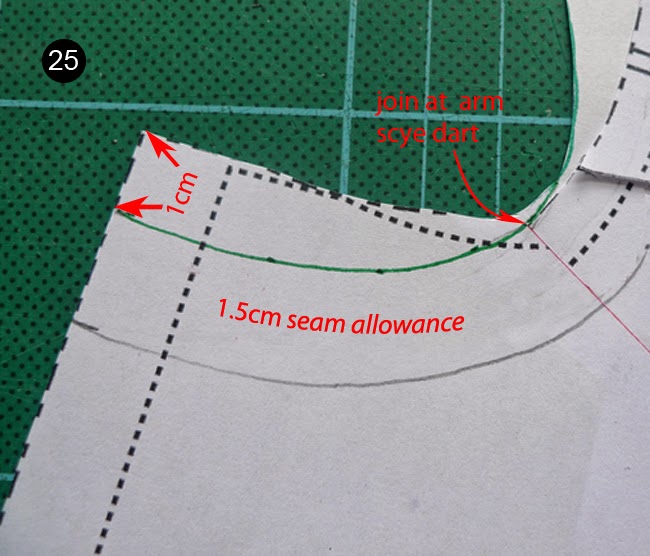
The next step is up to you.  I've dropped the arm hole a little because I prefer to wear sleeveless garments with more room in the arm. (I don't particularly like when the fabric rubs up closely against my underarm, especially for summer garments!)  I also think it works better with the v-shape of this pattern. This is totally up to you, I know many sewers feel the opposite way.
If you do want to drop the arm scye like I have here's what you do:
25) Measure 1cm down from the arm scye and draw a freehand curved line to join at the arm scye dart.
Now we have to make sure the bodice back matches wht we've done on the bodice front.
26) Measure 3.5cm from the neckline on the bodice back and draw a curved line to the centre back, dropping it slightly.
27)  a)  Glue a sheet of scrap paper along the arm hole for the bodice back.  
b)  Take your pattern for the bodice front and place it on top of the bodice back, so that the shoulder seams line up perfectly.  Trace the new cap sleeve onto the bodice back, and the line which connects to the arm scye dart, so that you have a matching front and back.
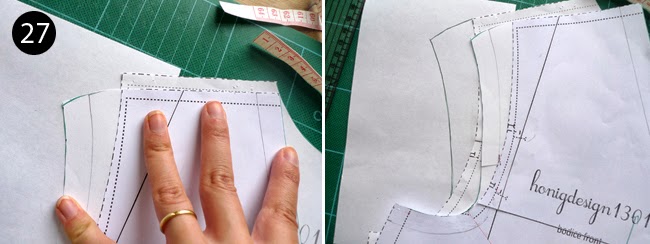
28)  If you've dropped the arm hole on the bodice front, make the same adjustment on the bodice back, measuring 1cm down.
You should now have a bodice front and back that look something like this.  
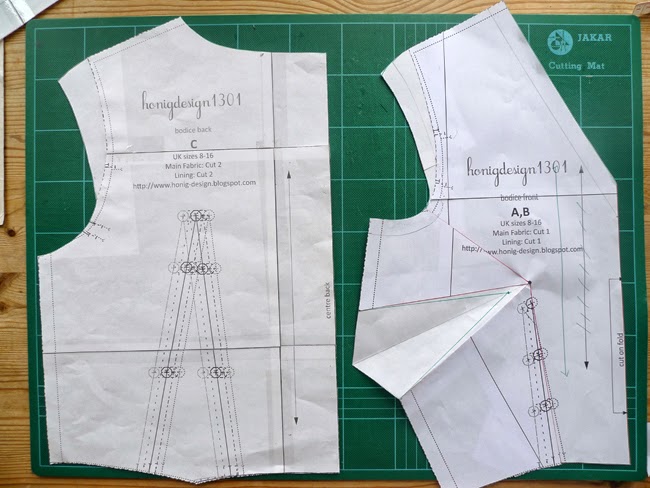
A couple of things to check:
- Measure your shoulder seams - do they match?
- Measure your side seams (excluding the dart excess on the bodice front) - do they match?

As with any garment you draft, it's really important to sew a quick muslin to see if any further fit adjustments need to be made.

Click here for Part 3 - a few tips on sewing it together, and show how I made the pocket for the dirndle skirt.





Friday, 27 September 2013

make this pattern


Happy Friday!  Here's a new tutorial  for you.  A few of you mentioned that you'd like learn how to make my Summer and the City dress, so I figured out a way to show you how to draft the bodice yourself.   If you do want to make this but don't have time now, you can find it later in the "Make This" section on my blog.

Here's what you'll need:

          • base pattern (download it here)
          • glue stick / tape
          • ruler
          • scissors
          • sharp pencil 
          • tracing wheel or something pointy
          • sheet of scrap paper
          • a coloured pen or pencil is useful but not necessary

We'll do this in 2 parts:

Part 1:  Moving the waist dart on the base pattern to the side seam, and making adjustments for a sleeveless garment
Part 2:   Drawing in the neckline and shoulder cap, and repeating for the bodice back.

Here we go with Part 1.  Our base pattern has a waist dart, but we want a bodice with a bust dart at the side seam.  Here's how to move it over, and make a couple more adjustments along the way. 

1)  Print out the base pattern and cut your size.  Refer to the size chart below.  I'm working on a size 10.


Here's a quick cheat sheet on some of the terminology used below.

2)  Draw a line through the centre of the waist dart and through it.  (Make you draw exactly through the centre of the dart that corresponds to the size you cut out)
3)  Placing a ruler on that line, measure 2cm up from the tip of the dart.

4)  Mark this point.  This is the actual bustpoint for the bodice pattern and referred to from here on as the dart apex.

5)  Draw the new waist dart, joining the apex of the dart to the bottom of the dart legs for your size.  


6)  At the bodice side seam, measure 10 cm down from the arm scye and mark.
7)  Draw a line from this point to the dart apex
8)  Using scissors, cut or "slash" the left leg of the waist dart to - but not through - the dart apex.
9)  Now do the same along the newly drawn line from the side seam to the dart apex:  slash to but but not through the apex.

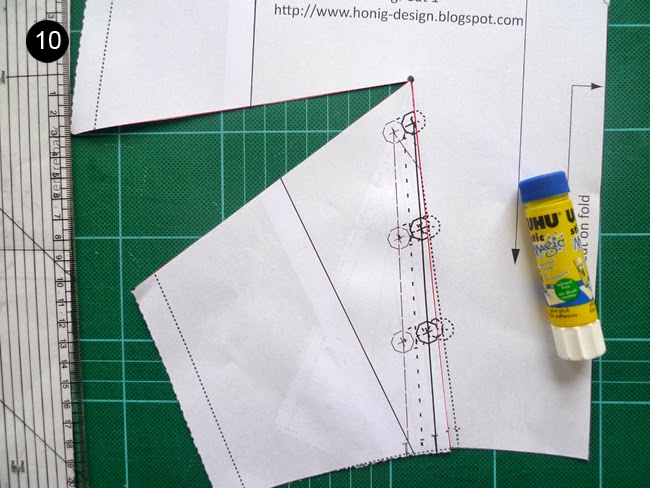
10) Now you have a moveable lower left corner of the bodice.  Close the waist dart by moving the left leg of the waist dart to the right leg and glue or tape securely.  This will open up the bust dart.

11)  On the pattern you've downloaded, you'll notice some small circles on the arm scye.  These represent the arm scye dart.  (I am working from a different print out and have marked these points with my pencil above.)  Draw a line from the two circles on the arm scye on your size to the dart apex.
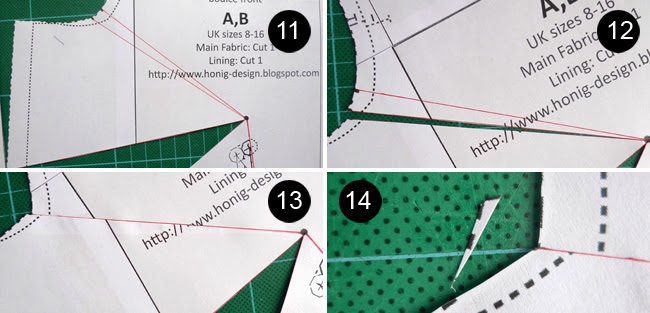
12) Slash the lower dart leg along the line you drew, to the dart apex
13) Close the dart by moving the lower and upper dart leg together and glueing or taping the overlap in place
14) Clip away the small excess


You now have a very wide bust dart on the side seam, and you've closed the waist dart and the arm scye dart.
15) Glue or tape the new bust dart onto a piece of paper.

16)  Now we want the bottom leg to meet the top leg of the bust dart.  Make a clean fold along the lower dart leg to the dart apex, as best as possible.  Press down along the side seam so that the layers of paper are neatly folded, and the lower and upper dart legs meet each other neatly. Using a tracing wheel or something pointy (I'm using my pivot tool) punch through the three layers of paper lightly, along the side seam line.
17)  Connnect the punched dots with a pencil.
18)  Trim away the excess paper.

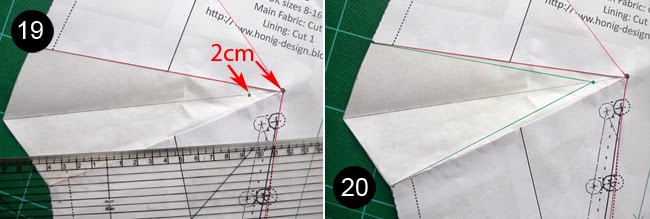
19)  Draw a line through the centre of the bust dart to the apex. Mark a notch 2cm down that line, to the left of the apex.  This is the new bust dart point.
20)  Draw in the legs of the bust dart by connecting the new bust dart point to the end of the original dart legs.

We have to make an adjustment for the V-neck. (If you do not want to add a V-neck, do not include this step)  
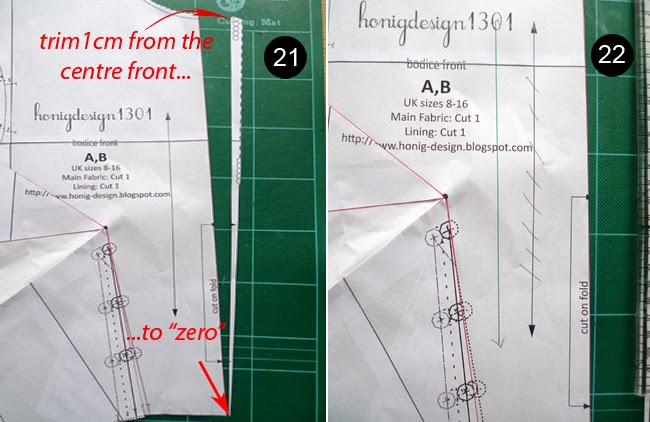
21)  Measure in one centimetre from the centre front at the neckline and mark.  Draw a long line from this point down the front of the to where the centre front meets the waist, or "zero".  Trim along this line.
22)  Draw in a new grainline parallel to the centre front.


We're nearly there - we've moved the waist dart, adjusted for the sleeveless bodice and lower neckline.  

Click here for Part 2 - How to draw in the neckline and the cap sleeve, and how to repeat this on the bodice back.

Saturday, 21 September 2013

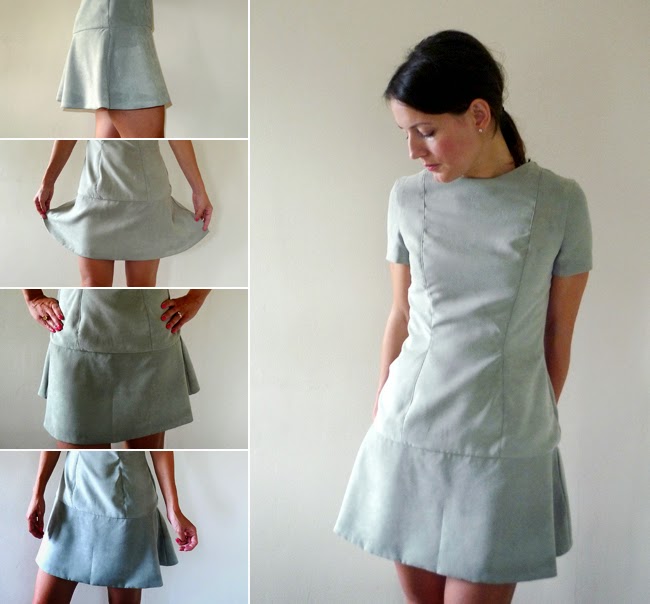
the most impractical dress ever?

It's September 21st and officially the last day of summer here in the northern hemisphere, 
and I'm sharing my last summer dress of 2013!
...the one that I didn't wear all summer.
Don't you hate when that happens?
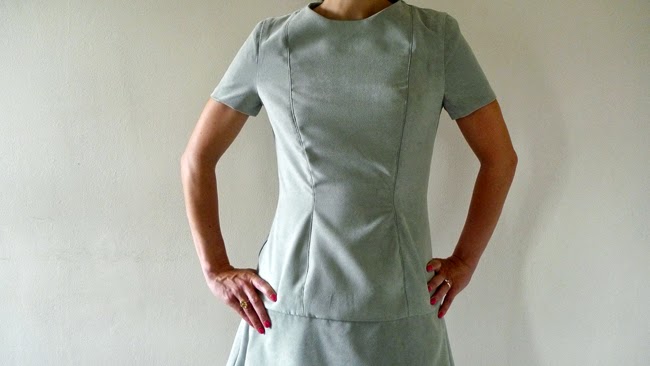
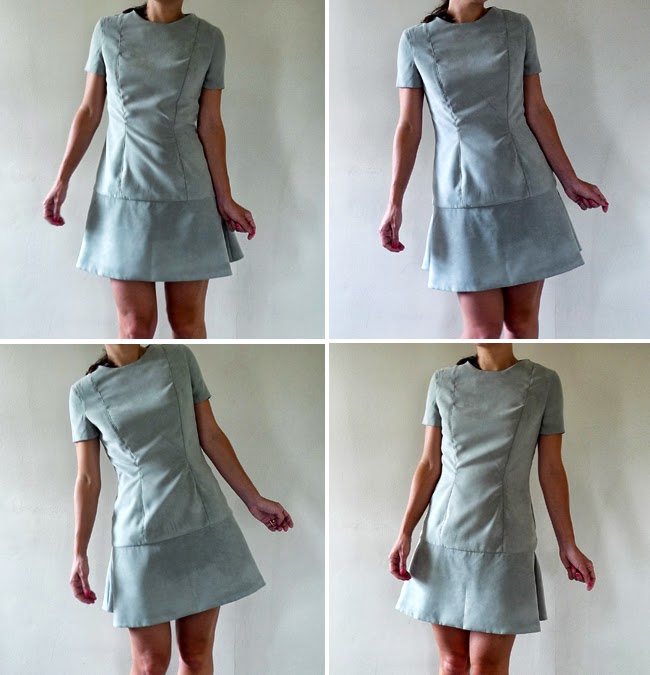
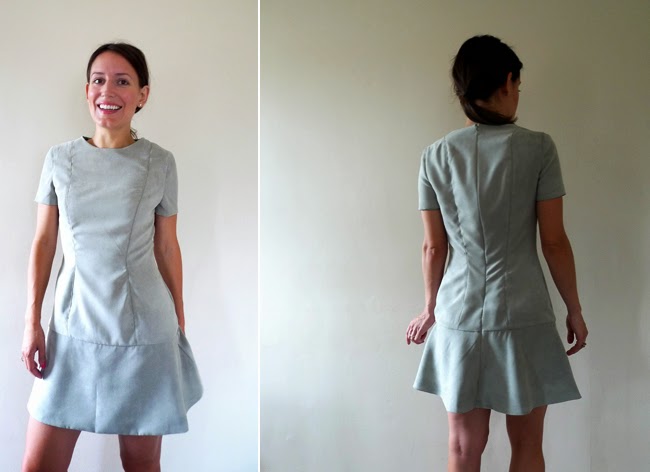
By the time I had it stitched together, I learned rather quickly that faux suede isn't breathable...
I actually worked up a sweat just posing for these photos in the apartment...
I really had my heart set on a short leather minidress with a flouncy skirt, and it was all going rather well at first.   I managed to draft a pattern that worked with the mere metre of this faux suede I had in my stash 
(which I think cost about $2.99 at Fabricland)...
...but a light coloured minidress in a heavy fabric is possibly the most impractical item I've ever sewed.
(maybe even more than the Mary Poppins costume I wore that one time in my figure skating years)

The evidence:
- too hot / unbreathable for summer...
- ....in a springy green shade that doesn't work with tights for winter

Maybe next year I will wait for a rainy day and wear it will wellington boots.

I'd love to know - do you have a most unwearable project? Have you made something that fits, but that you physically can't wear?

Sweatin' it out

Sunday, 18 August 2013

scrapbuster necklaces

Happy Sunday sewers!
Just a quick post on a super satisfying way to use up leftover pieces of silk or lightweight fabric....
wow did it feel good to use these up.
You've probably seen these before...I didn't realise just how easy it is to make your own!
 Initially I didn't have the required wooden beads so I sacrificed an old necklace and it worked really well.
These are off to Canada and New Zealand as gifts. 

Adios, scraps!
If you want to give this a try,  here's a link to Martha's tutorial.


Monday, 5 August 2013

SUMMER and the City

Recently we've had some decent spells of an idyllic summer heatwave in London, blessed with a few Cat-on-a-Hot-Tin-Roof-type muggy nights, where you drop everything in the evening to be out doors among other sweaty people, drinking mohitos or ice cool lager and lemon. 
These nights remind me of my first few "grown-up" summers out of University, living in Toronto in an apartment full of girls, where summers are usually fantastically hot.  We spent our days working desperately to prove ourselves in entry level media jobs, our week-ends dancing until the early hours and countless nights in between watching reruns of Sex and the City and dreaming of the fabulous apartments and wardrobes of our future grown-up life, just like Carrie and her friends.  It was that summer that we were starting to find our footing in life, that poofy skirts with stiletto heels were all the rage.

So, there's something about a poofy skirt and stiletto heel on a muggy city night, that makes me instantly nostalgic.  

But there's a problem.
I never actually acquired that essential Carrie Bradshaw talent of flitting around in stilettos. (Not to mention the fabulous New York apartment, but I digress...)  In fact, I think I've regressed in the heel wearing department since those heady days of my early 20s.  Seriously, did I miss some right of passage how-to memo?
 Now as a "real" grown-up the day to day reality of city life for me most of the time means running for buses, hiking up and down escalators and jumping over giant puddles, Spiderman-like.  Not counting the heap of high heels stored under my desk at work to wear around the office,  on the street I usually count on...hate to say it...practical (flat, comfortable, safe) shoe options to get around.
(Mom was right)
On one of those muggy nights recently I jumped at the chance to take my new poofy dress out for a spin, but  felt that usual sting of regret that I had to leave my heels behind for practicality's sake.  But if there's one thing Carrie and co (and my Mom) taught, it's to be an individual -- and not to fear a loud print.   
So, about the dress...
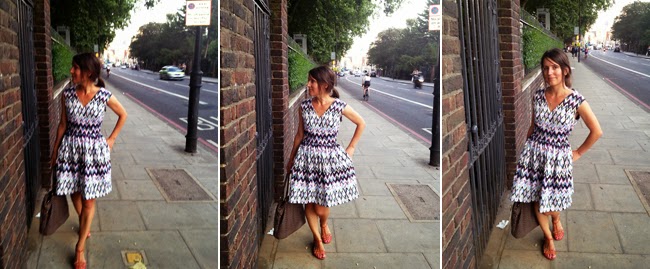
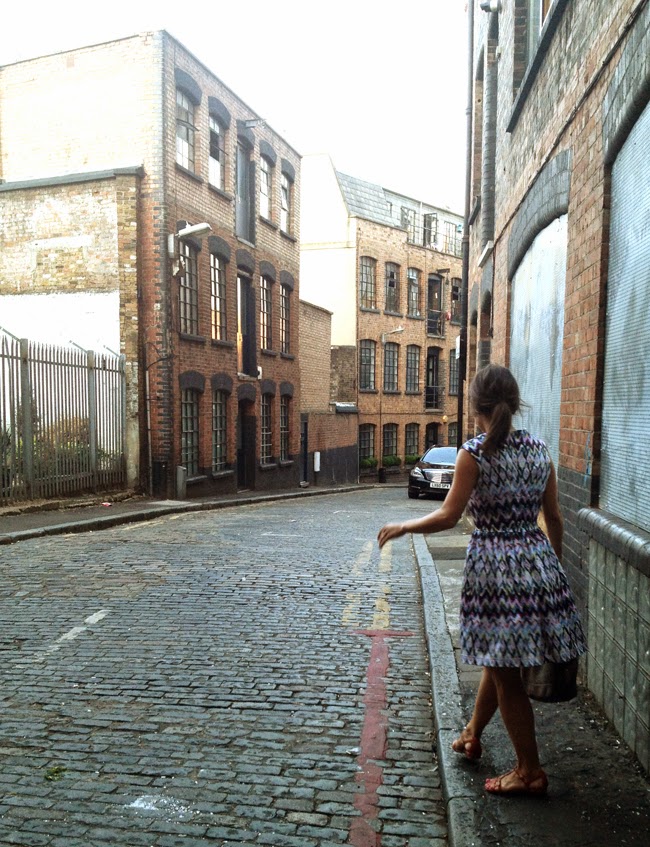
You might remember I bought this stretchy cotton in Heidelberg a a few months ago. After staring at it draped over my stand for a few days I decided the zig-zags were crying to be gathered into a skirt to emphasize their zig-zaggy-ness.  So, in the end it's a simple v-neck dress, only I extended the width of the shoulder by a few centimetres and rounded them slightly,  just to come out over my shoulder a little rather than end at the top of my arm  The bodice is lined to below the bust with self facing.

I've been reading through my blogroll and some amazing things happened over my break!  (But I'm also having a little problem accessing some blogs through Bloglovin' - even when I try to visit them outside of the reader it says the webpage is not available, even though there are new posts - is this happening to anyone else?)

Here are some highlights, in case you missed them:
  • I got an email from Hannah over at Kollabora letting me know about their community - have you seen it?  It's a really fabulous, refreshingly designed site with plenty of project inspiration (including things like jewellery and needlework), how-tos, and lots of cool features with large project photos and a Pinterest-style addictive quality.  I've posted my first dress and the interface is extremely slick and forgiving.  Looks like they are set for great things!
  • I noticed another new blogger network has sprung up - check out Paunnet's post about the Minerva blogger network -- the twist here is that you can buy a finished kit based on what a blogger in the network has made - very cool!
  • Check out Serger Pepper's post about a group of sewers doing some fun things over at the Pinterest Power Party.  Looks like a lot of fun!
  • Hold onto your hats - the Sew Tessutti awards entries are about to be revealed!  Sadly I couldn't get it together to part this year but can't wait to see the sure to be marvelous red and black frocks.
  • Both Jean at Jean Kaori Sews and Nat at Made in Home have made fabulous knit creations this month.  Both are so jaw droppingly inspiring, enough to make a girl want to run out and buy a set of knitting needles.
  • If you read Stardustsoul you'll already know about Anto's beautiful illustrations, but have you had a chance to download her paper dolls yet, complete with real high street outfits? They are all being shared on Instagram and Twitter.  What fun.
  • The talented ladies at By Hand London have released yet another lovely pattern - the Anna dress. Perfect breezy summer coolness. Fabulous stuff.
  • Have you seen Pauline Alice's flirty piping dress - could there be a pattern to come?
  • This month's theme at Le Challenge is Heroes. I haven't had a chance to take part in one of these yet but it's it's got my mind spinning with possibilities!
   
I'm working on updating the "Your Renditions" section of my blog with some lovely new Garden Party Dresses.

In the meantime -  if you've got the secret for stilletto wearing, could you please let me know?

Thursday, 1 August 2013

Crafty Science

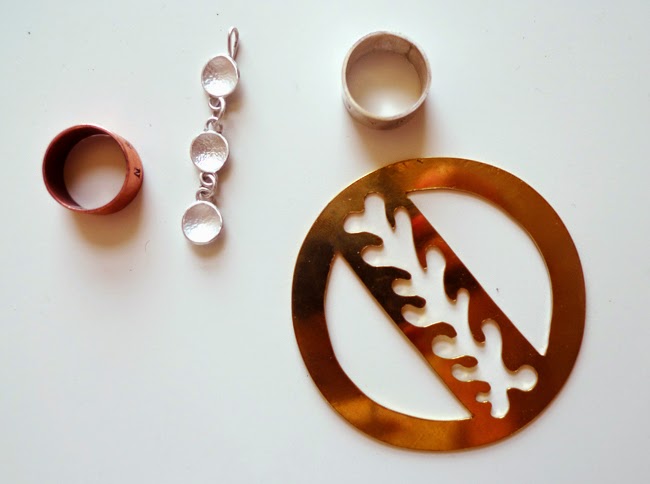
Well hello there, where did July go?  I haven't had a chance to do much sewing since my lawn tennis dress, but July did end up being a bit of a crafty month -  I spent a few days pretending to be a silversmith, through a jewellery course at Morley College in London.
I had a little work window and when I saw this three day taster course it really fit the bill - I've been dying to try jewellery making for a long time.  The course was immediately hands-on and I couldn't believe it when we were using the blow torch before lunch on the first day. We learned the amazing process of turning metal to a kind of maleable putty through a process called annealing - which means firing it up and then dropping it in a "pickle" solution, which allows you to saw it into shapes, press patterns into it, roll it into rings, you name it. It was as close to alchemy as I've ever been and utterly fun and fascinating.
I walked away with a practice copper ring and a silver ring, a dangly necklace and that Matisse inspired pendent above.  I've got some ideas for this...

We also got away for a little summer adventure this month, taking the sleeper train from London to go camping in beautiful Cornwall.  
You can imagine my disappointment when the crafty campers next to us brought out strands of bunting to decorate their site - why didn't I think of this! Wish I had a photo even... Next year...  

My only sewing purchase was these two blue buttons at a lovely little craft shop called the Makers Boutique.  There were only two left, but they reminded me of the colour of the St. Ives coast and I couldn't leave them behind.

I've got a long blogroll brimming with creative summery things to catch up on and can't wait to sit down in the next few days to see what everyone's been up to.  

Until then keep cool x


Wednesday, 3 July 2013

lawn tennis dress


I think I've mentioned on this blog before that I'm into sporting fashion, and, even though I'm only a tennis fan by marriage, tennis my favourite kind of sport - the kind where people are interested in seeing what the athletes AND the spectators are wearing.   There are a lot of cute articles out at the minute like this one in Marie Claire, which plots the history of Wimbledon fashion -- definitely worth a read.

Every year when June rolls around my sports mad hubby's eyes start to light up at the prospect of two weeks of non-stop tennis on the TV, on the radio, at the breakfast table...   He's especially keen to get day passes on the first Saturday of Wimbledon, which requires getting up at 4am and joining The Queue, and gets you into the grounds by mid-morning.  I usually oblige because they have Pimms and prosecco and strawberries and cream I love to watch a good game of tennis.

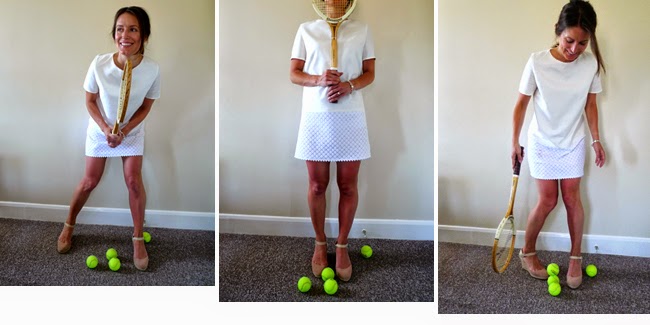
This year I decided I had to make it a little more interesting by whipping up my own "lawn tennis dress".
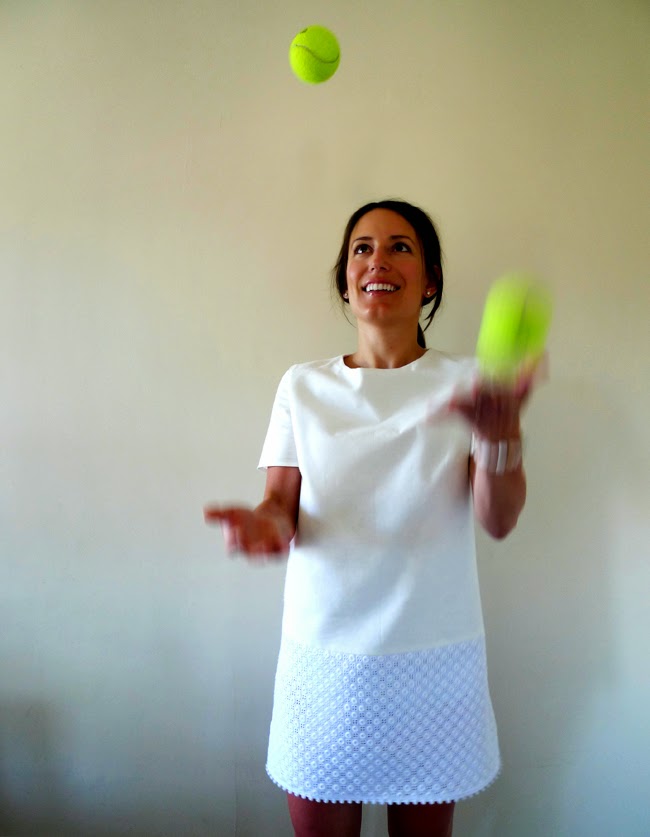
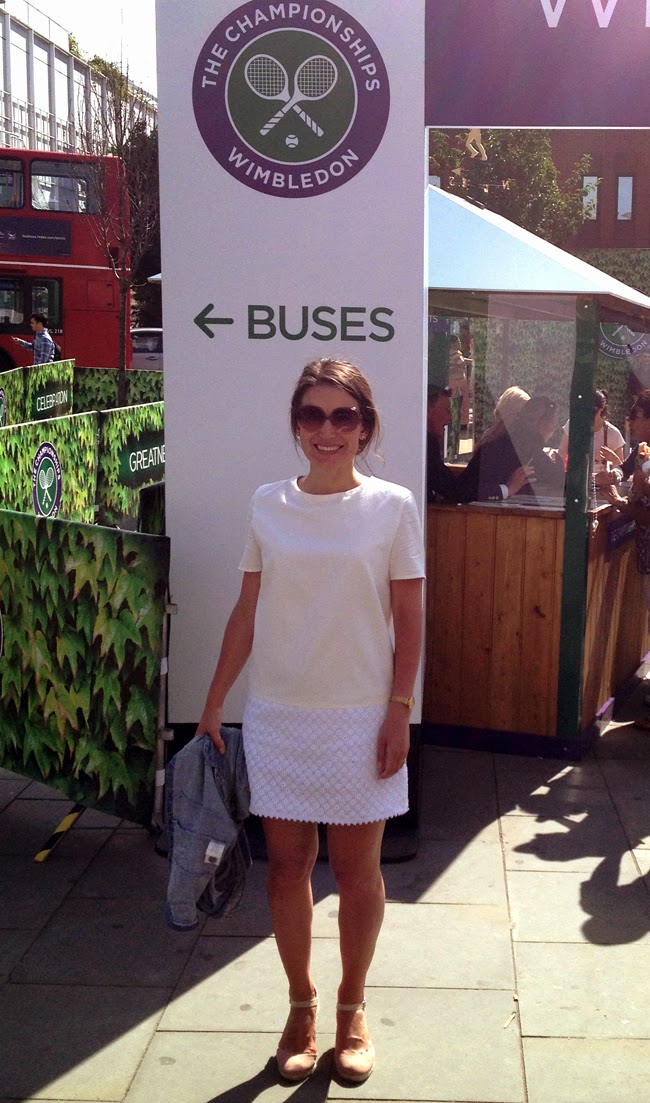
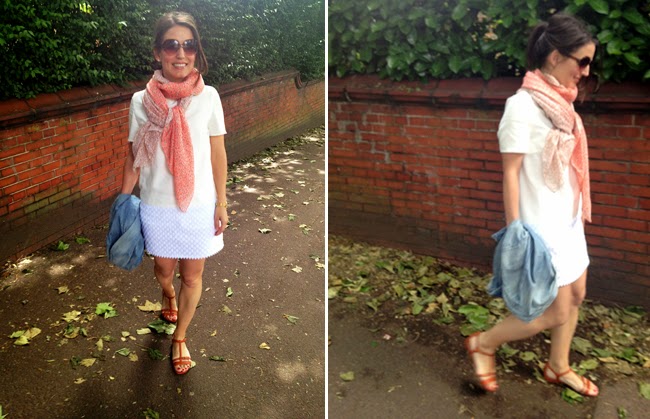
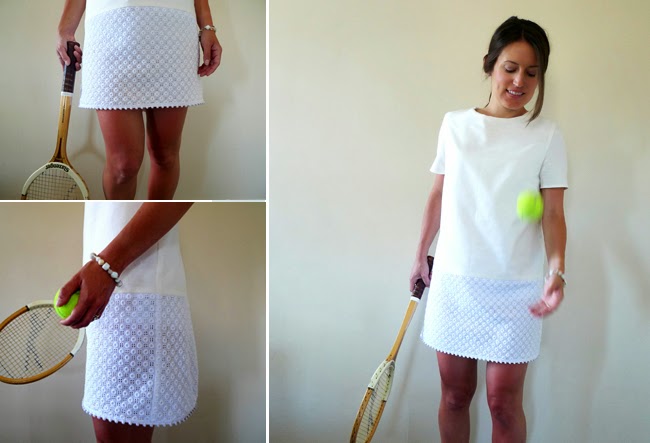
I made this Burda Retro Top 07/2013, and sewed a panel of leftover fabric from my Bianco dress to the hem as a "skirt". (And a scrapbuster - yahoo!)
The only problem was, despite arriving at the club at the indecent hour we usually do, this year's Murray Mania meant The Queue for morning entry was already full!   
Entry gates to the All England Lawn Tennis Club
 So we did what any hardcore tennis fans woud do and headed to Wimbledon common with our breakfast picnic.  Actually, the day in Wimbledon was nearly as fun as being inside the tennis club.  The excitement in the village was palpable and the sun shone nonstop.  Being up and out at crazy o'clock meant we had the whole day to enjoy.
Besides, I had to take my new minidress for a spin...
About the dress - it's ultra simple, but for me the cut was perfect for the day.  I  used the Burda pattern as a starting point because I loved the retro silhouette.   Since the weather's always a toss up I had to be prepared for heat or rain, so loose short sleeves it was, and I didn't want to sit for hours in something tight. 
   
I used an organic white cotton that was more of an ecru colour compared to the stark white of my Bianco dress fabric, and finished the short hem with white pom pom trim.
Maybe next year it will make its debut on Centre Court!

Anyone else out there into sports for the fashion?
Go Andy!