Sunday 24 March 2013

You had me at Elisalex...

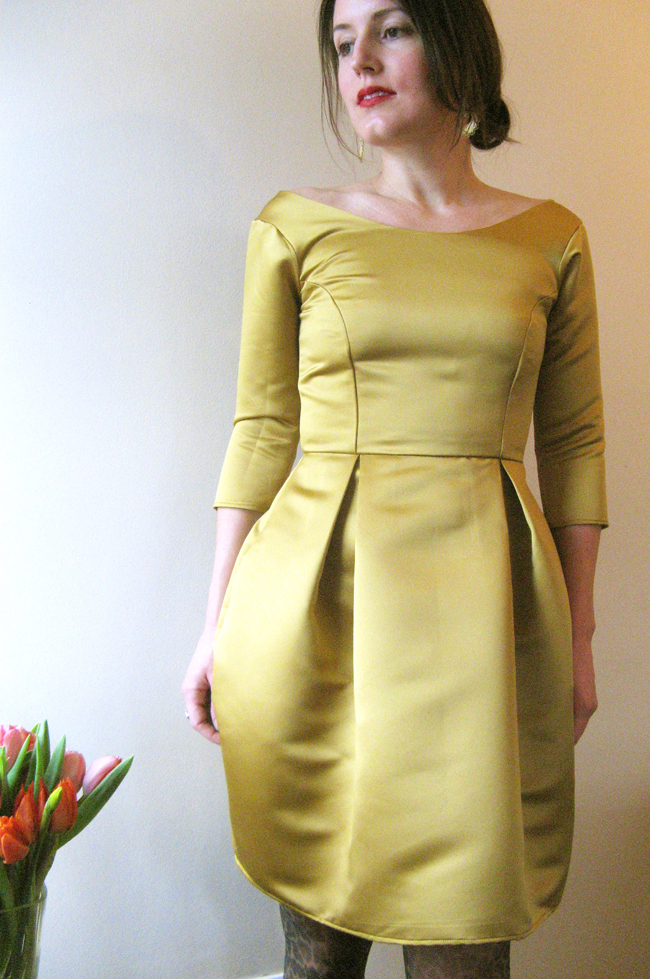
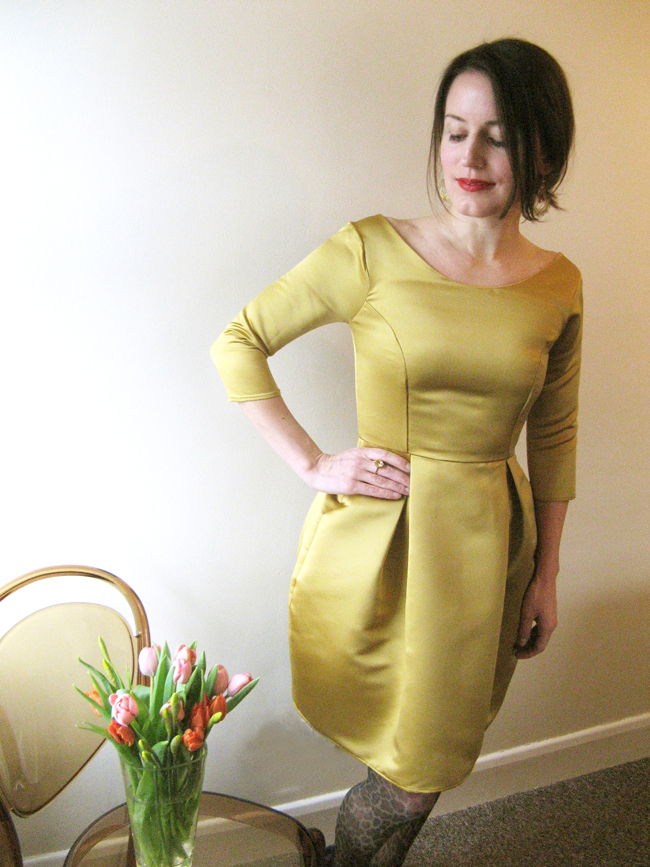
The moment I came across Elisalex, I knew she was for me. Being named "Elise", means that as a kid I could never find my name on  mugs, buttons, keyrings...you name it. (I'm guessing Elisalex may have had the same issue.)  Needless to say, now grown-up, a sewing pattern that sounds like my name is a victory of sorts!  And what better way to celebrate than with the colour of my favourite condiment...
 
Seeing the gorgeous versions by Oonaballoona & Closet Case Files, definitely sealed the deal.
 
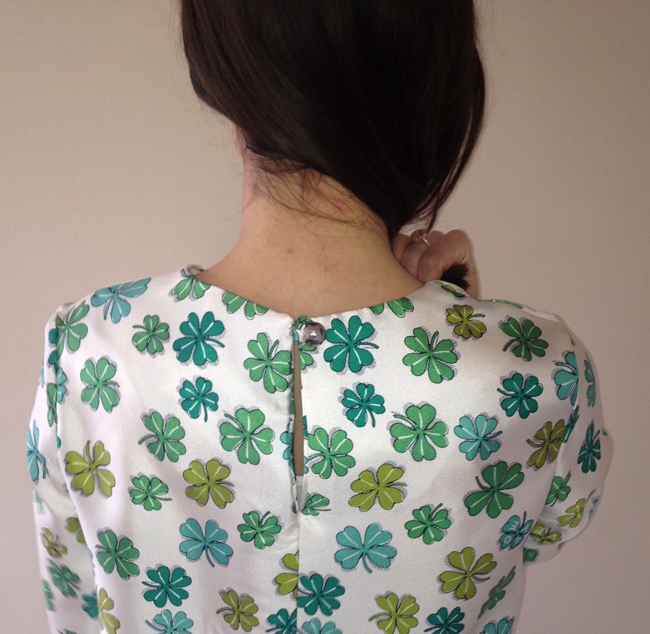
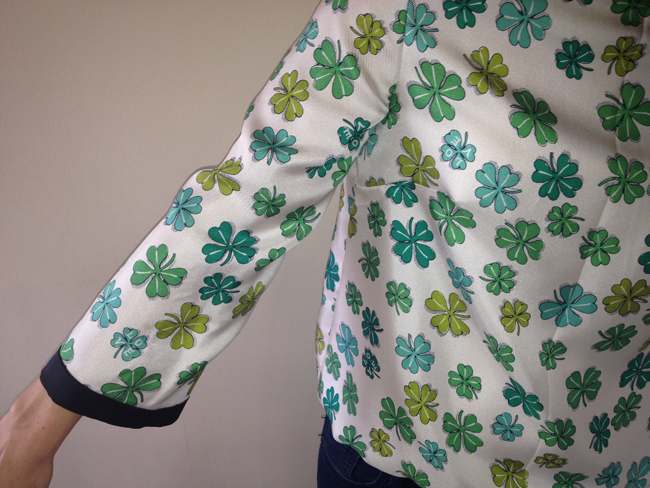
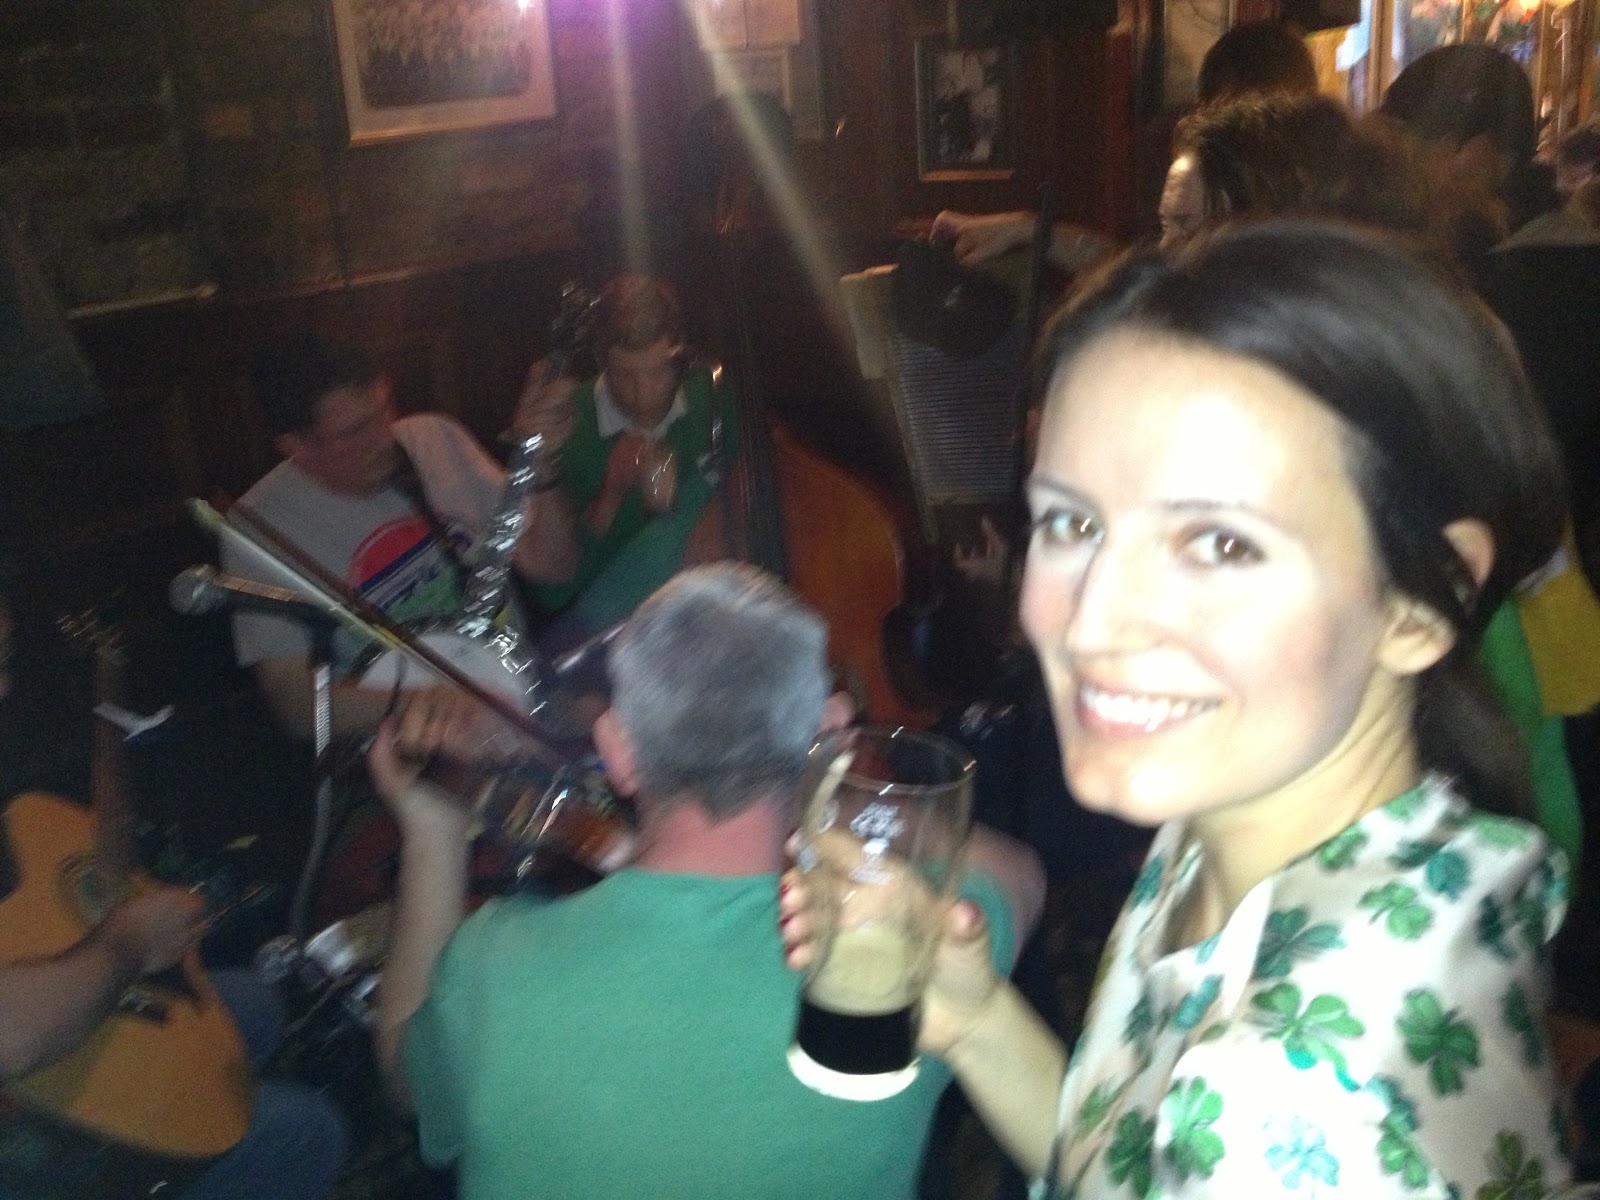
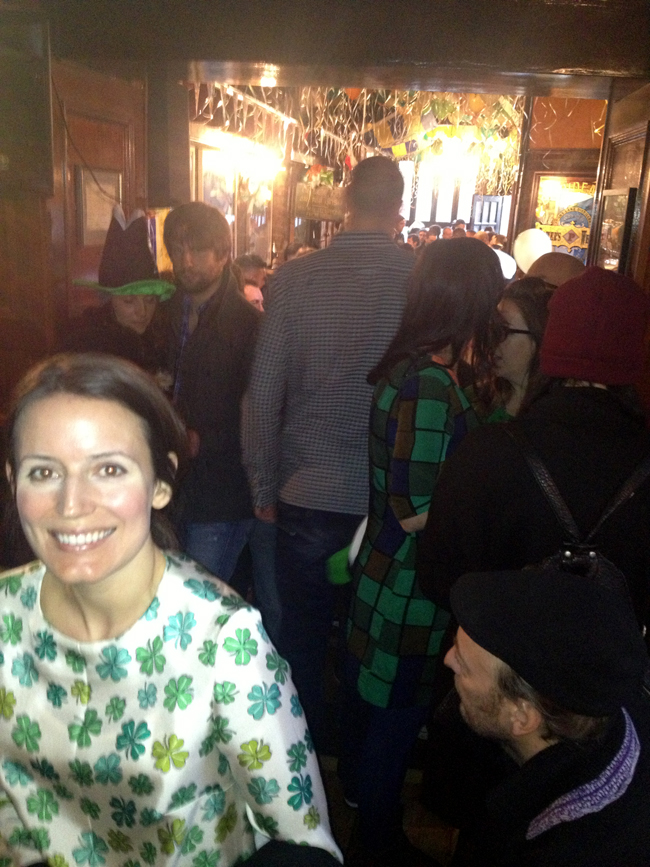
Don't look too closely or you'll notice a few sewing flaws (yep, that's you arm scythe seam).  That's because it didn't take me long to renege on my New Year's resolution of not sewing at the last minute, and I got a little sloppy.  In a bid to wear Elisalex to a party last week-end, I found myself hunched over the pattern, nursing a hangover, and sewing well into my fourth hour of Six Nation's rugby (a marriage concession).  My hubby blissfully unaware, in a few short hours we were meeting 30 friends at our local pub for his surprise birthday party, and here's me stitching like mad. 
We made it on time, Elisalex didn't.
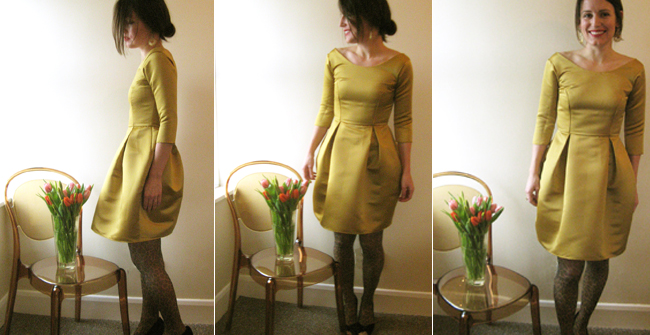
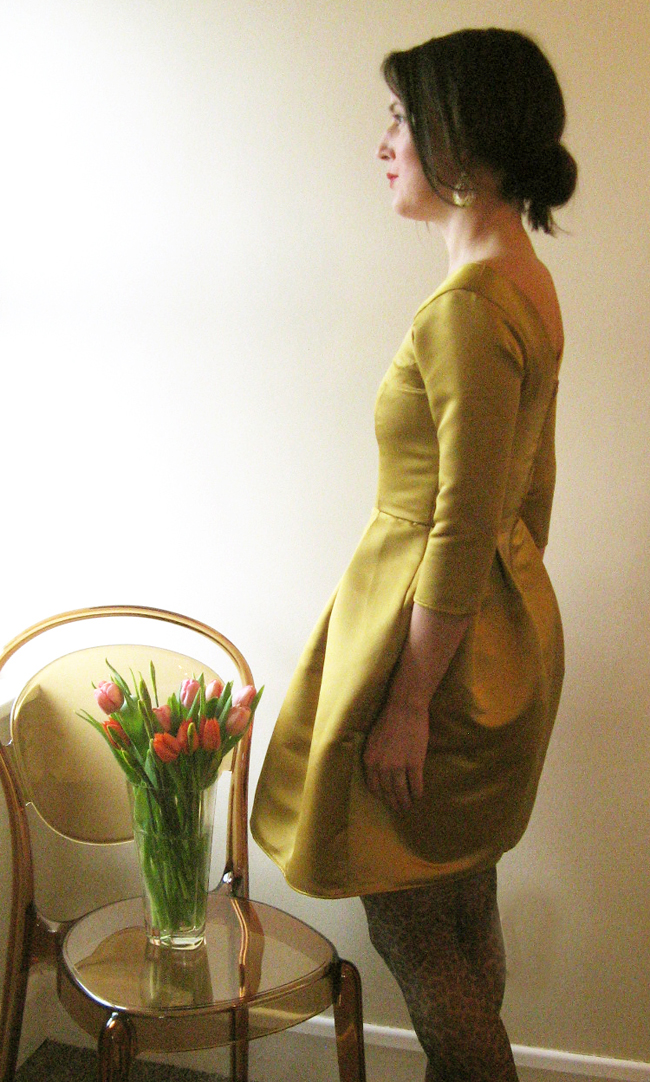
In hindsight, I'm happy I had this week-end to spend hiding from the snow and leisurely putting on the finishing touches.  The duchess satin maybe wasn't the best choice of fabric (check out that little bit of puckering), but the colour seduced me.
 
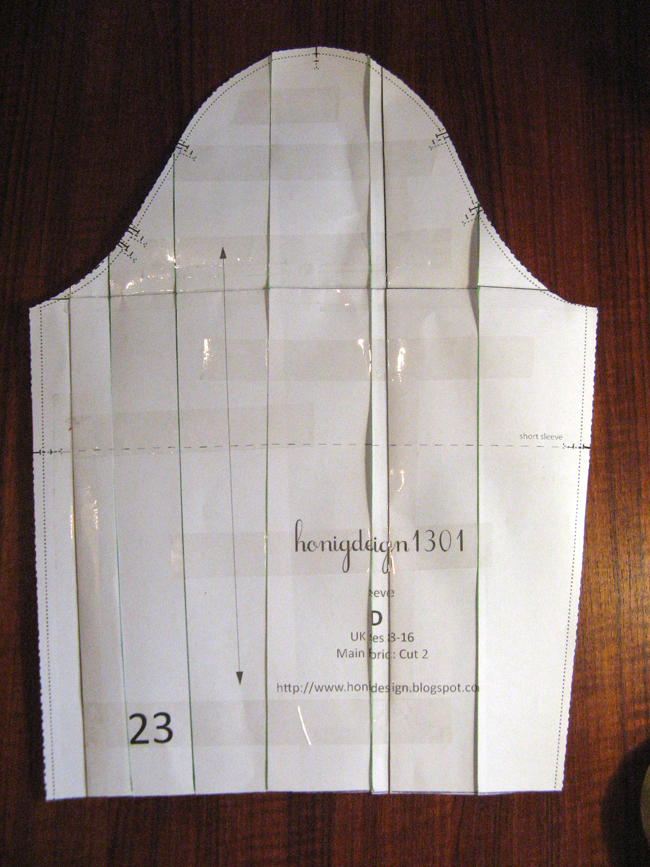
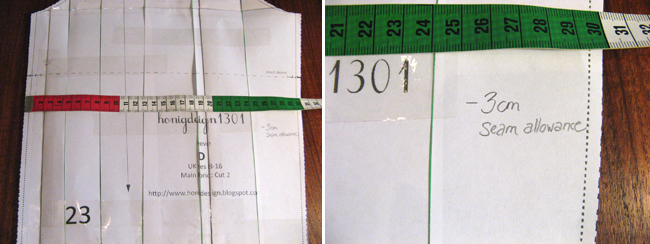
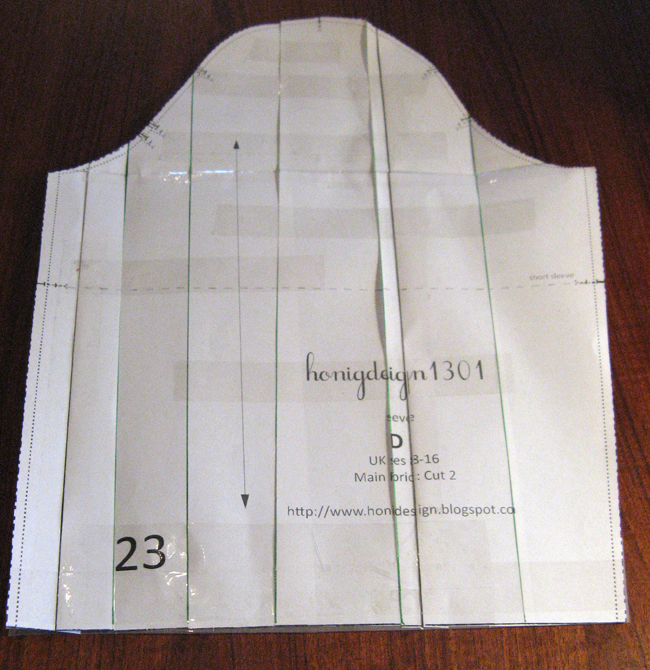
The only thing I changed was to take in the sleeves using the tutorial I posted earlier (a personal preference and nothing to do with the pattern, which came together beautifully), and to take off some length, which I do with every commerical pattern, being a mere 5'4".  I maybe could have adjusted the bodice slightly to fit my frame but hey life's busy, and I don't mind the bit of shoulder.
 
I love what the girls at By Hand London are doing, from the edgy designs to the tongue n cheek descriptions, to the elegant packaging.  Can't wait to see what's next.  (Hopefully Elisalex 2,3,4,5,6...)


Friday 22 March 2013

Spring GPD Renditions...lovely ladies all in a row!

Just in time for Spring, the first Garden Party Dresses have sprung!
It's so exciting to see renditions of this dress being made all over the world!
 
Here's a version from Needles in Germany, don't you love how she added a collar and cuffs?  I love the end result!  I think I have to try this myself too.
Nikica in Croatia made this lovely polka dot GPD!  She used a very lightweight fabric and it turned out beautifully.  I love the thin black belt and details on the sleeves which you can just see poking out.
Here's Sleek Silhouette's ravishing raspberry version.  I love how the higher waistline brings out that ballerina look!  Very elegant.
 
Just a reminder if you are planning to make this dress, I mention it in the instructions but the sleeves are on the narrow side.  Check out my tutorial on how to customise them to your size before you start snipping!
 
Happy Spring everyone!

Sunday 17 March 2013

Shamrock

Thanks everyone for your suggestions on what to do with my 2m of silly holiday inspired fabric.  In the end, I played it safe - maybe too safe...
A loose fitting blouse with sleeves just above the wrist, and black satin bands.  You know how I love my bands.
 
Perhaps I should have heeded longredthread's advice and gone for short sleeves.   It really is like wearing a shamrock garden.  Showing some arm would have minimised this.  

As often happens, a day after I finished, I was walking down the high street and I had a moment of clarity about what I SHOULD have done.  Short sleeves with gathers, bodice hitting just below the hip.  The good thing is that I have 1 metre left, so I can try again next year!
 
Or maybe not....for all my hesitation about wearing it out today, it was nothing a pint of Guinness couldn't cure.
 
Happy St. Patrick's Day everyone!


Monday 11 March 2013

GPD check-in and some help please!

Hello everyone!
 
I'm soo excited to hear that some of you are close to finishing your Garden Party Dress.  I'd love to see it and share your renditions here.  If you would like to comment with a link to your blog or photo, I'll post it here.  Or, if you don't have a blog, email me at designhonig[at]gmail[dot]com.  Can't wait to see!
 
In other news, I wanted to share with you my latest lunch break, low-blood-sugar-induced, impulse purchase. 
 You're not seeing things.  That's nearly 2m of clover printed silk.  I think the moment I actually put my hand in my purse was when I saw the word LOVE printed in one of the clovers.  And this one wasn't even from the remnant bin! 
 
I skipped backed to work like I'd just found a pot of gold, but the horror really set in when I got home and realised I had 2 metres of clover printed silk!
 
In my head I was thinking of something like this Burda pattern, with a St Patrick's Day twist...
...but now I'm afraid it will look a little too Riverdance...
 
Any suggestions?  Quick!


Wednesday 6 March 2013

Customising the sleeves on the GPD - tutorial

Want to change the width of the sleeves on the GPD?  Here's how...
 
Cut out the sleeve pattern piece, and draw a few vertical parallel lines.  Cut up to but not through the seamline at the sleeve cap.
 Now, if you want to make the sleeve narrower, simply move the pieces toward eachother so that they overlap.  Or, spread them apart if you want to widen them.
 
Below, you can see how I've narrowed it slightly.  Tape up the loose pieces.  (If you are widening, you can use a glue stick to glue the strips onto another piece of paper, when you are finished you can trim the excess away.)

If you are narrowing, the sleeves should be no smaller than the circumfrence of your elbow when it is BENT.  Also, remember that you have to factor in 3cm of seam allowance, as these are included in the pattern already.  The end width should be your preferred measurement plus 3cm. (1.5cm seam allowance on each side)
 Glue or tape the bottom edge onto another piece of paper and straighten it out, using a ruler.

 Trim away the excess and you have your full pattern piece.
 
NB: Not shown here, you also need to redraw the grainline at a right angle to the sleeve hem.

If you are widening, straighten out the bottom by lengthening the sleeve at each side, then draw a line across the bottom so that it meets the centre of the pattern piece, or your preferred length.
 
I hope you find this tip useful for any pattern you sew!

Monday 4 March 2013

Moving the skirt band on the GPD - tutorial

Thank you everyone for the enthusiastic response the pattern I posted this week-end!  I'm really happy so many of you like it and I can't wait to see your versions!
 
As promised, a quick tutorial on how to change the location of the skirt band, if you are sewing version 1.  If you noticed the difference between these two versions, I had to drop the band on the right since I was using lace. The version on the left is true to the pattern.
If you want to change the location of your skirt band,  use pattern piece K (version 2), and draw two parallel lines 8 cm apart (the new location of the band), at a right angle to the centre front.
Next, trace off the band onto a new sheet of paper.  I've used tracing paper here, you could use a light weight piece of paper or a pattern tracing wheel.
(I've cut a size 10 - the line on the side seam of the skirt is not added seam allowance but the size 8 marker.)
 Now, add 1.5cm seam allowances to the new band on the top and bottom ONLY. 
Return to pattern piece K and add 1.5cm seam allowances to the bottom of what is now the top third of the skirt, and the top of the bottom third of the skirt.  This means the distance between the two is no longer 8cm but 5.
Cut away the 5 cm in between, and you now have three new pattern pieces.
 
 
Do the same to the back and you're ready to go!
 
If you're changing the length of the skirt and you want to include a hem band, it's the same process, without cutting away any of the main pattern.  Simply draw a 2.5cm band onto the bottom of the skirt, trace it off and add seam allowances, to the top and bottom but not the sides.
 
The reason you have to go through these steps, rather than simply cutting a strip of fabric, is that the skirt is an a-line and not a rectangle, so you want to make sure to maintain the angle on the side of the skirt.
 
Stay tuned, on Wednesday I'll show you how to customise the sleeves to your desired fit.
 
Until then, happy stitching!
 

Friday 1 March 2013

Garden Party Dress Pattern - FREE!


Well, hello everyone!
Fancy a sewing project  this week-end?  How about your very own Garden Party Dress?!   I'm so excited to finally be able to post this pattern!  (Remember versions, 1, 2 and 3?) It's been a super fun project, the only glitch - my printer breaking down at the last minute - but what's life without a little drama?  I hope you all like it as much as I do.
Download the pattern here, and the instructions here

Please print on A4 paper and check that your printer is on 100% scale (not scale to fit)

Before you cut your fabric, please read these two tutorials:
  1. Customising the sleeves.  The GPD has a very fitted bodice designed with little ease, especially in the sleeves.  You may find these too narrow - it's a good idea to measure the sleeves and adjust them before you cut.
  2. Moving the skirt band.  This tutorial shows you how to adjust the location of the skirt band, especially important if you plan to use lace!


Why I love wearing it:
  • It's a simple and modern dress, but with a bit of vintage about the silhouette.
  • It's an all-in-one outfit.  No cardigan or shawl needed.
  • It's versatile and multi season. You can wear it with heels, boots or sandals for a complete look, either casual or dressy.   Sew in a warm wool for cooler days or lightweight cotton with short sleeves for summer.
  • It has SIX style options, on the skirt, bodice and sleeves. 
That's why I love it, but why not see for yourself?  I'd be endlessly grateful, if you do sew it, if you could send me a little feedback to designhonig[at]gmail[dot]com.

Starting Monday, I'll walk you through how to tailor the sleeves to your own fit and how to change the location of the skirt band (version 2) and hem band. (As it's an a-line skirt, not a rectangle, you'll have to trace off the new band location and add seam allowances accordingly.)

I've also tried to make the .PDF experience as painless as possible!  Please refer to page 3 of the instructions for details on what you need to print.  

I really hope you enjoy making this and would love to see your versions if you do.

Until Monday, have fun and happy stitching!

Elise